Saturday, October 29, 2011

hate less. love more.


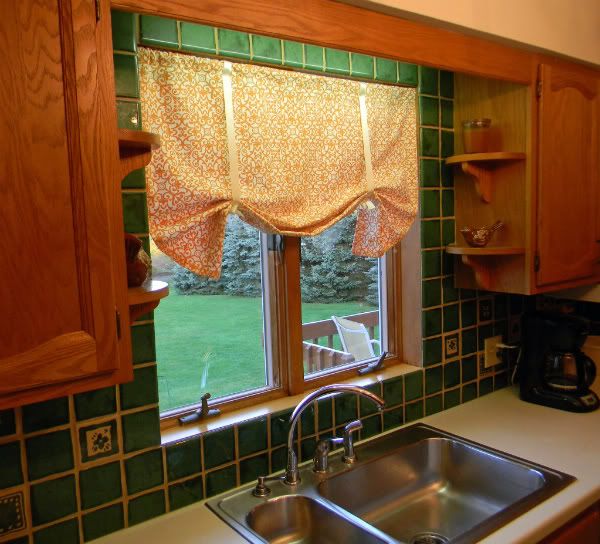
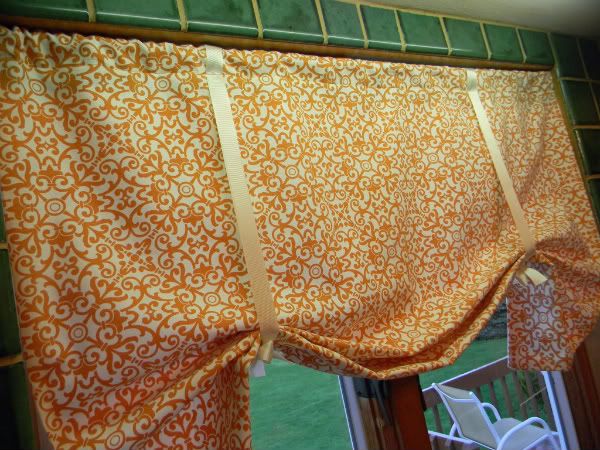
It's the little things in home decorating that add your own personality to your space, right? Since I am loving this cream/tangerine colored fabric, I went to Hobby Lobby and bought another yard. I had this idea to cover the back of a kitchen shelf that is directly across from my kitchen curtain, made w/same cream/tangerine fabric.

Using a tape measure, rotary cutter, scissors, and elmers spray adhesive (first time using this product - love it, but you only need a little bit and you should cover anything that you don't want sprayed), I set out to change my shelf to look like this.
Tell me it's not cute!

On a scale of one to ten, with a ten being a full blown PITA, this little project was about a 4.5. And, it is rated a 4.5 by me simply because I so suck at math. Now, one would think that after measurements are taken and written down...that the fabric would then be cut according to taken measurements. But no......that would be the easy way. 1/4 inch here, 1/2 inch there - I so hate fractions!!! {...and seriously, it blows my mind that I have 2 grown sons who are both excellent in mathematics.}...and it's a darn good thing I bought an entire yard of fabric. Here is a "before" look.
I cut an "x" in the fabric for the outlet. Sprayed the wall, placed the fabric on wall, smoothing out with a credit card as I went from left to right. The fabric is actually hung in 3 pieces. Left, center and right. You may notice that the pattern is not perfect, but I think because it's so busy, it's okay.

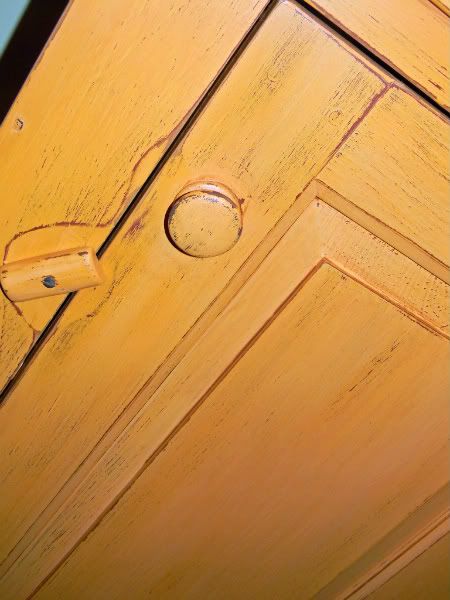
I used to hate this shelf. So boring. Blah. Dullsville. But now...I hate it so much less. :) :)

Thanks for stopping by today! Hope you have a happy week-end!
hugs, patti

Thursday, October 27, 2011

...it's a table.

After I hoed out and painted our foyer, we were left with a bench, rug, wall art and a mirror.

For 3 days straight, I cleaned up coffee spills, by the front door, from the hub's very early morning. He makes his coffee in the kitchen and only needs to carry it about 20 feet to actually leave the house. Just....cannot...be...done...without...a...spill. ;)

Browsing around the house after cleaning up the day 3 spill, I spied these two chunky candlesticks that I had on top of a bookcase. They were looking pretty blah up there....so, I thought, put them together and you may just have the perfect height for a small table that could be placed next to the foyer bench.

Hop in the shower and quick run to Hobby Lobby before work.

Go to work. Come home, make supper and then, open up that gorilla glue. This was my first time using gorilla glue. Holy crap is what I have to say about that! You only need a little bit...and once you glue 2 pieces together, it is for-ev-er.

Here is the finished little foyer table that holds the hub's coffee every work day morning. He sits there, puts his work boots on, and amazingly makes it out the door spill free. :)


He loves it. I love it. I love my coffee spill free ceramic tile floor. Total cost was $12.00. The painted wooden top piece was six bucks - 50% off, bottom pine piece was .99 and I needed to buy the gorilla glue, which was just under five. Cheap and easy. The table, I mean. :)

I'm linking up to Twice Owned Tuesday, at the creating a House of Grace blog.
Thanks for stopping by today!
hugs, patti

Monday, October 24, 2011

...one last dining room piece to share.


This past summer, I was given this dresser that belonged to my Aunt Jean. Sadly, at age 80, she passed away. Her family invited everyone to come to her home and take what they might like. I saw this dresser {that had one broken drawer front}, and knew right away that I could turn it into a buffet for my dining room. Here's a before...
I used a palm sander on the top of the dresser, sanding down to the bare wood. Then I applied 3 coats of clear poly to the top - no stain, as I wanted the top to be light. The hubs cut a piece of wood (also only applied clear poly)and fit it into the top space where there used to be a drawer.
My favorite part is the beautiful wood grain that shows through on the top surface.
The bottom of the dresser was lightly sanded and painted with two coats of satin black paint. As a final step, I coated with the clear poly.
I really love the way this dresser, now buffet, turned out. I hope my Aunt Jean is looking down from heaven with a smile on her face. I believe she would be so happy to see it in my dining room. It holds all of my table cloths, placemats & napkins - the added storage is awesome!

I'm linking up to Metamorphosis Monday @Between Naps on the Porch.
Thanks for stopping by today!
Hope you're enjoying this Fall season.
hugs, patti

Saturday, October 22, 2011

fabric wall art!


It's true that I'm a "use what I have decorator".
BUT, while re-doing my dining room, I was striving for a more sophisticated feel.
There was one wall still blank - in need of something pretty.
I ordered a large art canvas on-line. It arrived, and the colors were not quite right. {cost me $25. to return}
This week, I bought a beautiful large art canvas from Burlington Coat Factory. Got it home, held it to the wall, but it just didn't work. {another trip to Syracuse and that's been returned too.}

When I chose that "bright, happy" fabric for my dining room drapes, I was limiting myself when it came to choosing artwork. Truthfully, this never even occurred to me...until I tried 2 pieces that didn't quite work...because of the drapes.

And then...Friday morning I woke with what I thought was a brilliant idea. :)

Since it felt like I was "competing" with the drapery fabric......why not join forces with that funky, bold fabric and create some wall art from said fabric??

How to do this without the art feel "homemade"? {not that there's anything wrong with a homemade feel...you know me, I love homemade}. I just wanted it to be a little bit classy. At the risk of sounding boastful, I think I succeeded.

Two trips to Hobby Lobby later (I broke the glass in one of the frames and needed to go buy a 4th frame. ugh!), and this is my pretty dining room wall. Makes me smile every time I see it.


Steps to creating this fun wall art:

1) Determine what you would like to cut from your fabric.
2) Rough cut around the image.
3) Iron on fusible web to help eliminate fabric fray (I had mine in my stash - bought at jo-ann's by the yard).

4) Using the sharpest scissors you own, closely trim around your image.
5) Choose background fabric (I used a cream kona cotton).
6) Pin your image to your background fabric. Use plenty of pins because you don't want your image to move - moving causes puckers.
7) Not sure you would need this step, but I ironed it, while pinning.
8) Zig zag stitch - or if you have a fancy sewing machine, this is where you would applique. My sewing machine is an oldie but goodie, so I simply set it to a zig zag stitch that I liked and went with that. Carefully stitch as close to the edge of the image as you can.
9) Iron and then spray starch the wrong side, and then iron again (and again, haha!). Wrinkles bother me. ;)
10) Using the back of the frame, center your image. Stretch it around and tape to the back. I used painter's tape because you can lift and press down again hassle free.
11) Assemble inside frame and hang.

Easy, right?
I love that this project gives me the visual impact I was going for. I love that it matches my favorite part of the dining room - my drapes. I love that it really doesn't look homemade. I love that I only needed to buy the frames - the frames I chose included the double mat - (total cost = $69. before I broke the glass in one - $82. was my final total. ) And finally, I can't wait for my mom to see! :)

It's a whatcha got week-end at Lolly Jane, so I'm linking up (for the very first time). Great stuff over at Lolly - if you don't know that already!


Thanks for coming by my blog today!
hugs, patti

Wednesday, October 19, 2011

...a little bit more orange.

Because orange is such a happy, funky, fun color!! :)

Since my galley kitchen is small, I have an issue with food storage - you know, canned goods,
spaghetti sauce, coffee, etc. I've used this wood cupboard as a pantry since we've lived in this house - about 16 years now. Here's what it always looked like. It was stained w/a cranberry color stain and I loved it....'til I painted and changed up my colors. Then the cranberry didn't work anymore.

before...


Since I painted my kitchen a light orange, I went ahead and applied two coats of orange paint to my pantry cupboard. Then, using 220 grit sandpaper, I gently sanded the entire piece. Next I applied a coat of Valspar glaze which I had tinted with some acrylic "nutmeg" paint. The glaze was wiped away with a clean cloth, and this is how it turned out.

after...


some closer looks...


...and just because I love it so much, here's my homemade kitchen curtain that helps to tie the space together. :)

That's all the orange I have for today. :)
{I do have a couple of Pier One orange pillows on my living room couch, but no pics to share. haha!)

I'm linking up to the Piece of Work Wednesday party at Primitive & Proper.
Thanks for coming by my blog and have a super day!
hugs, patti

Sunday, October 16, 2011

...use what you have decorating.

That pretty much sums up my decorating style. LOL!!!! ;)

I've spent a bit of money since June on re-decorating my house. Okay, a more honest statement would be my decorating budget has run dry. That said, I thought it would be okay to have some DIY art hung in my kitchen. It's the kitchen, afterall. :)

So, I had this Donna Downey iron on by Prima.
I had some cream colored Kona cotton.
I had a wood frame and some black spray paint.

After spraying the frame black, ironing the image onto my cotton and putting them together...this is what I came up with. Really simple...but I love it. :)


The hubs put up our new kitchen light yesterday. Can I brag about the super clearance deal that I got on this light? It's made by Good Earth, purchased at Lowe's and was originally priced at $149.00. I paid $34.95!!! {Yeah, baby...I just love that deal.} As a sidenote - last week when I was in the same Lowe's, they had this light - one left, still on clearance - but it was marked $74.95. hee, hee. :)

Here is the second zero cost, 'cause I had everything already, kitchen wall art. The frames were being stored under my bed. The fabric is a jo-ann's quilt square, cut in half, that I bought last year for .99 cents. I made the first one and hung it to the left of the door frame (that's a pocket door from the 80's. haha). Since I had enough fabric and a second frame...I made another one and hung it to the right. Not sure what it is about symmetry, but it honestly makes my brain so happy. I don't think it's "too much"...do you? Please let me know your thoughts. :)

...just for fun, a before pic of my kitchen. That was the very first time the hubs ever cut any moulding. None of the corners came together evenly. LOL! That wallpaper was SO HARD to get down. My right hand is still sore from all of the scraping. Just that little bit (both ends of my galley kitchen) took 2 whole days to remove. Crazy.
I seriously dislike my kitchen cabinets (so much so that NO, I will not paint them and I will not spend the money to switch out the hardware.) I think with the little updates that I've made w/paint, curtains, new light & wall art...they are now less disagreeable to me. Our plan is to build a new kitchen in 5 years. I can wait. I can wait. I can wait. ;) :)

Thanks for coming by my blog and thanks to Donna Downey for thinking outside the box with her rockin' iron ons. I love that one matches my kitchen so perfectly!
hugs, patti


p.s. I've ordered an orange shag rug for the kitchen. Not sure though...will it be too much...will I be brave enough to use it? LOL! It's been shipped --- will keep you posted.

Friday, October 14, 2011

hey...it's me, Patti. a long lost blogger.

I see my last post is dated August 2011.
To justify that......
My foyer is re-done.
My dining room is re-done.
My hallway is re-done.
My kitchen is re-done.
My oldest son's bedroom is re-done.

What started out as a wall paper removing project turned into a this room looks so nice....now I must do this next room. :) :) A bathroom is still on the list, but I'll get to that after the hub's and I replace some floor tiles at the back door.

I have loved every single minute of all of this re-doing!!!
Wait.
That may be a tiny bit of a lie.
There was a point when I was removing the hallway wallpaper from hell that I thought "what have I gotten myself into??" I just kept at it...scraping that felt backing off inch by miserable inch, and seriously, it was so worth it!!! It's amazing what removing wallpaper and simply painting the walls can do for a house. I actually said to my hubs last week "it's beautiful in here". I don't think I've ever thought or felt this house was beautiful before. We bought this house because of it's awesome location (on a river w/football field sized backyard). It's a cut-up, small ranch that I would never, ever choose. When the hub's retires - 6 years from now - we hope to take down some walls and do some reconfiguring. 'Til then, I'll keep on working with what I have. :)
When you walk through our front door, this is what you see now.
Here is the "before"...

The dining room "after". Fresh wall & ceiling paint, new ceiling fan (I know Sabrina Soto would have a heart attack that it's not a chandelier, but we need the fan.) I now have a funky cool rug under my new table set too. :) Yes, the table came w/4 chairs, I removed one for the pic. I still need some wall art, but haven't found the perfect thing...and don't want to settle.
Here are the lined drapes that I made with that "bright & happy" fabric by Richloom. I also covered a chair that sits next to the dresser turned buffet. {pics of that project to follow.}

the "before"...
Last week-end, I painted the couple of small walls in my galley kitchen a light orange (after taking down more wallpaper, of course). I was feeling so bold about that color choice. ;) This morning, I made this cute little curtain to help bring the room together. No pattern, I just measured and stitched a rectangle. The curtain is lined with part of what was a cream colored top sheet. Fabric & ribbon are from Hobby Lobby. I love how it turned out! :)

To my good scrapbooking buddies who's blogs I've neglected...I am sorry! I am off now to check out some of what I've missed. Hope you all know that even when I'm away...I still think of you. I actually have not played with any paper since June. I know. It feels weird. I'm hoping once the weather turns to crap that I'll be pulled back into my craft room. Will keep you posted on that!

hugs, patti